Picture this. You are running up or down the mountain and come face to face with a bull elk. Your arms are shaking with adrenaline. You can’t catch your breath and you are finding it extremely difficult to steady your pin. Now stop and think. How can you prepare for this situation without being in it 24/7? Actually, there are some good ways to prepare you for these specific situations. These different routines that I am about to share can be done in your backyard as well.
Having an Olympic archery range nearby is a blessing for me because I don’t have wide open spaces to practice. What this does allow me to do is to practice with my friends where we can all participate. It not only makes it fun to ‘compete’ against your hunting buddies, but it also helps you hone your skills as a bowhunter in a tough situation.
The first arrow is always the most important. In most hunting situations you will only get one shot and you need to make it count. So many archers tell me how they get frustrated when they shoot fifty arrows in a session and the last arrow flies off target. If you get to that point stop practicing! If your arm is exhausted or your shots are erratic, take a break. Poor practice will lead to bad form in the field. Instead of focusing on that last shot, focus on #1. Take your time and really focus and picture that arrow hitting dead center of the bullseye. That is your goal!
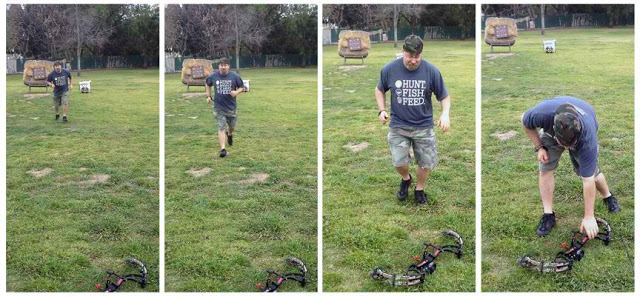
Stretch out your arms and back lightly before you take that first shot. Loosen up and then fire a half dozen arrows down range. After you pull the arrows and get back to your bow, drop the arrows and get ready to elevate your heart rate! Remember doing wind sprints during practice? That’s exactly what you are going to do. Let’s say you are 40 yards away from the target. Set your bow on the ground with an arrow next to it. Then as fast as you can run toward the target, touch it, and run back to your set-up.

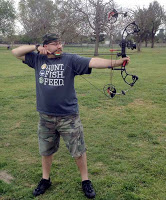
Slow down and safely pick up your bow. Nock an arrow, draw and settle your pin, and let the arrow fly. Try to complete this step in less than five seconds. What does this accomplish? First off, it gets your heart rate up. It also helps you create a shot scenario and shows you what your body will be doing in that shooting situation. It also shows you what you can improve on when confronted with a high adrenaline type of shot situation.

For the next round, run the sprint, but before picking up your bow, slow down and do ten quality push-ups as quickly as you can. This will fatigue those arm muscles a bit, but that’s what you want for this scenario. Repeat the shooting sequence and record your results.
 Work on these exercises for only a few times in each practice session. Mix them up from time to time, too. Over time it will make you more confident and allow you more flexibility in your shooting. It allows you to condition yourself (to a point) to ‘buck fever’ and to mentally focus on the target and NOT your shaking hands. It is not meant to be a cure for buck fever, but more so as a training tool to help you mentally and physically prepare for it. If nothing else, it’s a great way to practice!
Be First to Comment