Product Review: Insane Archery Camera Mount
You draw your bow. You release an arrow. You watch it hit home on the animal you are hunting. Now you have a great story to tell. It’s just too bad you didn’t have the shot on video to share with the world. Well, now you can with an Insane Archery Camera Mount.
I have been reviewing this for a few months now trying to use it every which way I can to utilize it completely. For the purpose of this review I am using a 2008 PSE X-Force and a 2006 PSE Vengeance.
You can find the specifications on the Insane Archery website, but here are the specifications I found the most interesting:
It’s 2.8 oz, so it’s lightweight.
It has 180 degrees of motion.

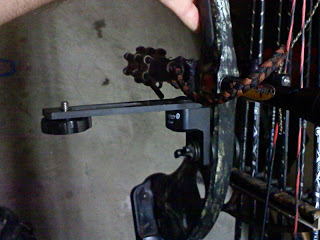
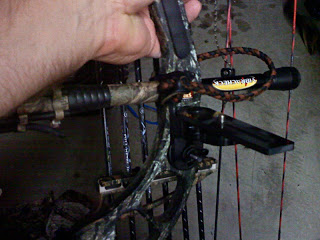
When I ordered my camera mount I truly didn’t know what to expect. I watched the installation video and decided it was worth a try. Once I got it and tried to put it on my PSE X-Force, I quickly realized I should have ordered the optional Riser and Sight Mount Kit. The reason was that while I could mount the product to my stabilizer, I wasn’t able to grip the bow properly after installation. My bow has a short brace height, so the camera and mount just kept hitting my fingers. Mounting it there was out, so I ordered the optional kit and in a couple days I had the necessary accessories to mount it on my bow. Then it was decision time. Do I mount it on my sight (as recommended) or on the bottom left of my bow where I have better access? My decision was made for me as I keep my quiver attached to my bow. It turns out that my quiver full of arrows sits right in front of my sight, so there was no option of having the camera mount attached there. That only left the bottom left side of my bow. It would be completely out of the way of my arrows and still give me good position to video. While this does reduce your mobility to only 90 degrees (for filming your shot) it does offer up an unforeseen benefit. It can help balance out your bow when you have a quiver full or arrows attached. Bonus!
I am going to approach the actual review in two ways. The first is as a Southern California hunter whose method of hunting involves spot and stalk and includes a great deal of hiking. The second is going to be hunting from a treestand.

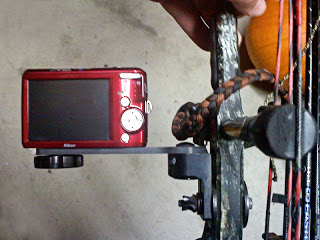
The first part of my review involves hunting on the ground. I have been testing out this product for many months to really understand it and to utilize everything it has to offer me as a bowhunter. As a SoCal bowhunter, you really have to want to have this attached to your bow. If it is something you know you want and can live with a few inconveniences, then this will be great. Don’t get me wrong, the product is great, but when you have to mount it where I had to and then have to hike 3 miles in, well, it can be annoying depending on the camera you choose. Keep in mind, I went a bit beyond what most will do in a video/shooting situation. I started off using a Kodak Z-i6 video camera. It’s flat, weighs next to nothing and when you fold back the arm 90 degrees it’s out of the way. My issue with this set up was the choice of camera itself. The arm performed very well using this camera, but I had to hit three buttons to get the camera to come on. (I see that Kodak has now released a new camera for the hunter looking to video his or her hunt. I have not had the opportunity to use it yet). Also, if you are spot-and-stalk hunting and using the Kodak camera and have the arm folded back to keep it out of the way, you MUST keep in mind that the camera will be in the way of you gripping the bow if the arm is mounted like mine is. You have to move it out 90 degrees to get your hand in to the bow grip. If you have to shoot quickly this may impede your ability to grip the bow unless you keep it out at 90 all of the time.
I then switched to a Canon HF200 video camera. It is heavier, but has more control and the quality is superb. The drawback with this camera is that when you are spot-and-stalk hunting and carrying your bow, the darn camera hits your leg if it’s in your right hand because you cannot fold it back 90 degrees as the camera impedes that. If you switch sides, the camera and mount get caught on the weeds. This was something I do not like, but it was my choice to use this camera because i wanted better quality AND I may have to make a shot further than 30 yards. That being said, I wanted a camera with a better zoom and higher video quality. With any of the cameras I tested on the mount, you will need to understand that you may notice some vibration at the time you shoot. That’s just the energy from the bow being transferred all around and through the mount.
My brother also tried the mount out and here’s what he had to say:
‘I tried the Insane Archery camera mount on a couple different locations on my bow and the camera shakes quite a bit at all locations. The least shake was 45 degrees left of center mounted at the stabilizer position. It still shakes a bit and when it was straight out, the shock from shooting would shut the viewfinder of the camcorder which shuts it off. Mounting 45 degrees to the left helped with that issue, though.’
 |
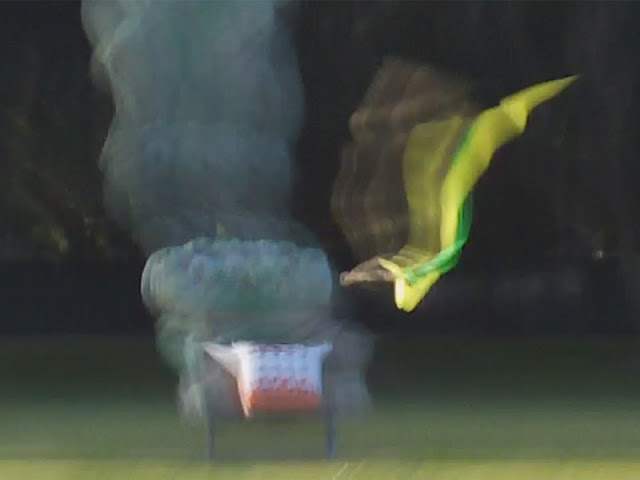
| You can see the vibration in this screen capture when using a small camera. |
On the ground, when you shoot your bow, the bow naturally falls forward. With a camera on the bow you have to be aware that if you want more than just the shot on camera and want to see the animal as it is running off, you will have to find the animal in the viewfinder and hold your bow up to follow it. It sounds simple, but with adrenaline flowing, 3-4 lbs of bow in your hand and you trying to follow the animal with your eyes it is more difficult than it seems. It will take practice and patience. Even so, if you plan ahead and practice, the Insane Archery Camera Mount is a great new tool for SoCal bowhunters.

While it works well for hunting on the ground, I feel that the Insane Archery Camera Mount is better suited for hunting from a treestand. I found that the camera mount was best utilized in a blind or in a treestand when you have minimal movement. The bow will naturally tilt forward and you’ll have better control of the camera. You won’t have the full weight of the bow pulling your arm down, as your arm will be at an angle. (On the ground your arm would be parallel to the ground, so following an animal after a shot could be more difficult). I found that in the treestand the camera mount worked great. It’s quiet to rotate the arm around and once it’s set you will not have to worry about it moving around during your shot. I could hang my bow, with camera attached, and when it came time for a shot I just slowly turned on the camera, hit record and waited for my opportunity. Simple as that!
I have seen some other camera mounts (not yet tested) and the Insane Archery Camera Mount stands out. It has the ability to mount to many locations and it has 180 degrees of motion. I have yet to see another camera mount as versatile as this one. If you want to film your shot when you are hunting, then I highly recommend getting yourself an Insane Archery Camera Mount (and using a slightly heavier camera). Tell them the SoCal Bowhunter sent you!
Be First to Comment